If you pay attention to the business segments on the news starting on Black Friday you will notice that sales figures are tracked by Adobe Analytics. For many people the first things that comes to mind on recognizing the word Adobe are their PDF files and not their Christmas shopping lists (even if in PDF files). It makes you stop and wonder what else Adobe may be tracking. There is another global (or at least Northern) organization, also with a red and white motif (at least for the front man) and notorious for tracking behavior (think naughty and nice).
Your author has also received E-mails from Adobe just over the past three weeks overflowing with buzzwords. A sampling:
- Digital Asset Management
- Digital Experience
- Digital Signatures
- Digital Transformation
- Digital Workforce
Adobe is already taking plenty of our money and as you can see from the list above they are willing to take more of it to help us do things we may already be doing or can do using the tools we have. The point of this article is to get you to stop and think about the latter and what you need to do with PDF files and perhaps not purchase an Acrobat subscription or—much worse—a Creative Cloud subscription.
The baseline for the narrative is a Windows 10 computer issued to you for your job functions. The applications are the current browsers Chrome, Edge, and Firefox and the big three Office 2019 applications Excel, PowerPoint, and Word. What follows does not necessarily apply to your personally owned computer even if it is a work from home computer. There is a summary for the macOS operators following.
In Windows 10, you have an out of the box “virtual printer” named Microsoft Print To PDF. It’s not a printer but it thinks it is.
After invoking the Print command as you usually do (or use CTRL+P; it works in all applications mentioned), navigate to the folder you want to save in, provide a file name in the File name text box, and click Print. Since you are now creating a file, your primary action button is Save.
This option is available in all applications mentioned, but it is not the preferred option. So, keep reading.
Each browser provides its own Save as/to PDF option which you select from the Destination (Chrome, Firefox) or Printer (Edge) drop-down menu; that is, you select this option as if you were selecting a printer. In Chrome and Edge, it is Save as PDF and in Firefox—just to annoy us—it is Save to PDF.
In the Office 2019 applications, the alternative is Save As. In your Save As dialog, navigate to the folder you want to save in and provide a file name in the File name text box. Beneath that is a drop-down menu labeled Save as type. Drop it down (some might say pull it down) and locate and then select PDF (*.PDF). In increasing order of annoyance in finding it, it is PowerPoint, Word, Excel. As above, your primary action button is Save. Now you are just creating a file.
Each browser is capable of displaying the contents of PDF files. It may be more accurate to say you can view the contents of PDF files since this tool is typically referred to as a viewer. If you received a new computer recently, when it came out of the box and you first logged on, Microsoft Edge was the viewer for PDF files.
There is no Open option on the File menu in any of the browsers so you have to drag and drop your PDF file onto an open browser window. This requires having both the folder containing the file and the browser window in view so you can drag from the former and drop on the latter.
Why would I want to do this you might ask? The viewers are not full featured PDF tools, which is the advantage. An evil doer will leverage advanced capabilities of the PDF format to attack. Since the viewers do not implement these features, they are safer if viewing is all you want to do.
Speaking of safety, you should never (Never. Never.) use a Web site that you find on Google that offers options to convert/join/merge/reorder/split, etc. and to which you have to upload your file. Neither at work nor at home.
And although this is a work-related article, if you use only your browsers at home, you have one fewer application to keep up to date and one fewer vulnerability to worry about.
As you may have gleaned from the above, Acrobat is, in one sense, a printer that you lease from Adobe. If you have a Word document that you need as PDF, you have options to create it without Acrobat.
If you need to change the document, you would not change the PDF file. You would go back to the Word document, change it, and “re-print” it to PDF. The same should be true for a document you receive. The sender should be responsible for the changes and “re-printing” or should provide the original Word document. But if not, you can try and leverage Word 2019.
When you perform the steps to open a file, PDF is in the list of file types that Word recognizes out of the box and you see PDF files as well as your DOCX files. You also have the PDF (*.PDF) selection mentioned above to filter. Select it from the unlabeled drop-down menu to the right of the File name text box.
Word will warn you that it is about to perform a conversion, optimized for text editing. You need to review the document formatting which is a prudent step for any file conversion, even using Acrobat. Opening PDF is just a Word feature. Opening PDF in Excel and PowerPoint is not available.
And finally, you don’t need Acrobat to sign documents; Reader works just fine.
For macOS, saving as PDF is available through the system print dialog. After invoking the Print command as you usually do (or use Command+P; it works in all applications mentioned), locate the PDF drop-down menu in the lower-left corner and select Save as PDF.
Each browser mentioned so far provides its own Save as/to PDF option which you select from the Destination (Chrome, Firefox) or Printer (Edge) drop-down menu. In Chrome and Edge, it is Save as PDF and in Firefox (annoying us across operating systems) it is Save to PDF.
In Safari, the option is Export as PDF from the File menu. It does not have a Save as/to PDF option as a “printer” in its Printer drop-down menu.
You can access the system print dialog from each browser (except Safari) by locating and clicking Print using system dialog. In Chrome, you first have to locate and click More settings. Now you can use the PDF drop-down menu described above. Safari only shows the system print dialog.
After you have selected the PDF options, you interact with the standard Save As dialog where you would name your file in the Save As text box and navigate to the folder you want to save in by browsing with the Where option.
In the Office for Mac applications you can use the PDF drop-down menu in the system print dialog or Save As from the File menu. For the latter, locate the File Format drop-down menu and select PDF. In Excel, it is under Common Formats. In PowerPoint and Word, it is under Export Formats.
The macOS browsers all have Open File available on the File menu, so you can open the file directly. You can also drag and drop the file onto the browser window. In Safari, you drag and drop to the address bar.
In the Office for Mac applications, PDF files can be opened in Word but not Excel and PowerPoint.
And finally, you don’t need Acrobat to sign documents; Preview and Reader work just fine. And don’t overlook what Preview can do in place of Acrobat. But those details are the subject of a future article.
It is true that Acrobat is the gold standard for PDF. A full list of features is available at the Adobe Web site at (as of the time this is being written):
https://www.adobe.com/acrobat/features.html
Depending on your business requirements, an Acrobat subscription may be worth every penny. But you may be able to accomplish what you need with tools you already have. Try them out and see how it works.
And don’t overlook sharing. Someone else in your department or college may have Acrobat and can help with a one-off (okay, maybe two- or three-off during the year) conversion.
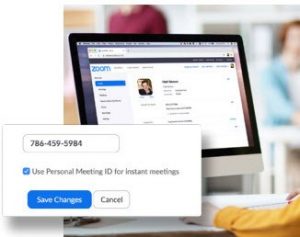 As we progress into the Spring Semester, we ask you to review the following best practices for securing your Zoom meetings:
 Information Technology has various processes in place for the procurement of computer hardware, software and services. These processes improve efficiency, ensure appropriate justification/approvals, and increase value of hardware, services and software procurement.


 Microsoft Teams is a workspace for real-time collaboration and communication, meetings, file and app sharing, and more.
 Microsoft 365 Training is a free, interactive, hands-on training platform that helps people develop technical skills related to widely used Microsoft products and services including Outlook, OneDrive, Word, Excel, PowerPoint, and SharePoint.